cbox


jmdalmighty
-
Posts
1234 -
Joined
-
Last visited
-
Days Won
22
Content Type
Profiles
Forums
Downloads
Gaming News
Everything posted by jmdalmighty
-
forget what i sad im going blind
-
well this says it all ibm did not come up at all and why did he not go to sevensins

-
this is a false and sholud be locked but funny story
-
this is a big lie and i no it plus sensce whne does devk kits or demosdont read discs got to the bluse screan and say a gamertag on top of that they guy dat posted this mode the account today has only 4 post which are all in this topic ontop of that y didint joker want it back FAIL
-
thatsright iam so smart
-
i know on top of that my first tut and it got pinnend i should get vip
-
right i found a website which alows you to format drive to wiis compablity it free click me lol
-
thaks alot it all worth it now lol
-
unluck about the debt hope they pay it of but immm preaty sure that comess in some whare in ema
-
well i gess so thats why the mic dies anywhy its more complacted then charging the battery plus this is the only tut to fix them all my own reaserch
-
well my parents are split so i get money because of that lol also if your parents ern more than doube why cant the buy u a damm controller
-
Its true when you reach the age of 16 you apply for Education monstrance allowance or ema for short and if the eprove you you get £60 every 2 weeks and £150 bonous at chrsmas and £150 during summer also you get £150 if wou get really good marks in your fianaly exams and kd i have £2,600 in my bank account
-
Dan in Brittan we get paid to go to school seriously we get £60 every two week if we attend all classes and that’s $90.4470
-
Thanks i spent ages tinkring about with mine too make this tut
-
spell check done B)
-
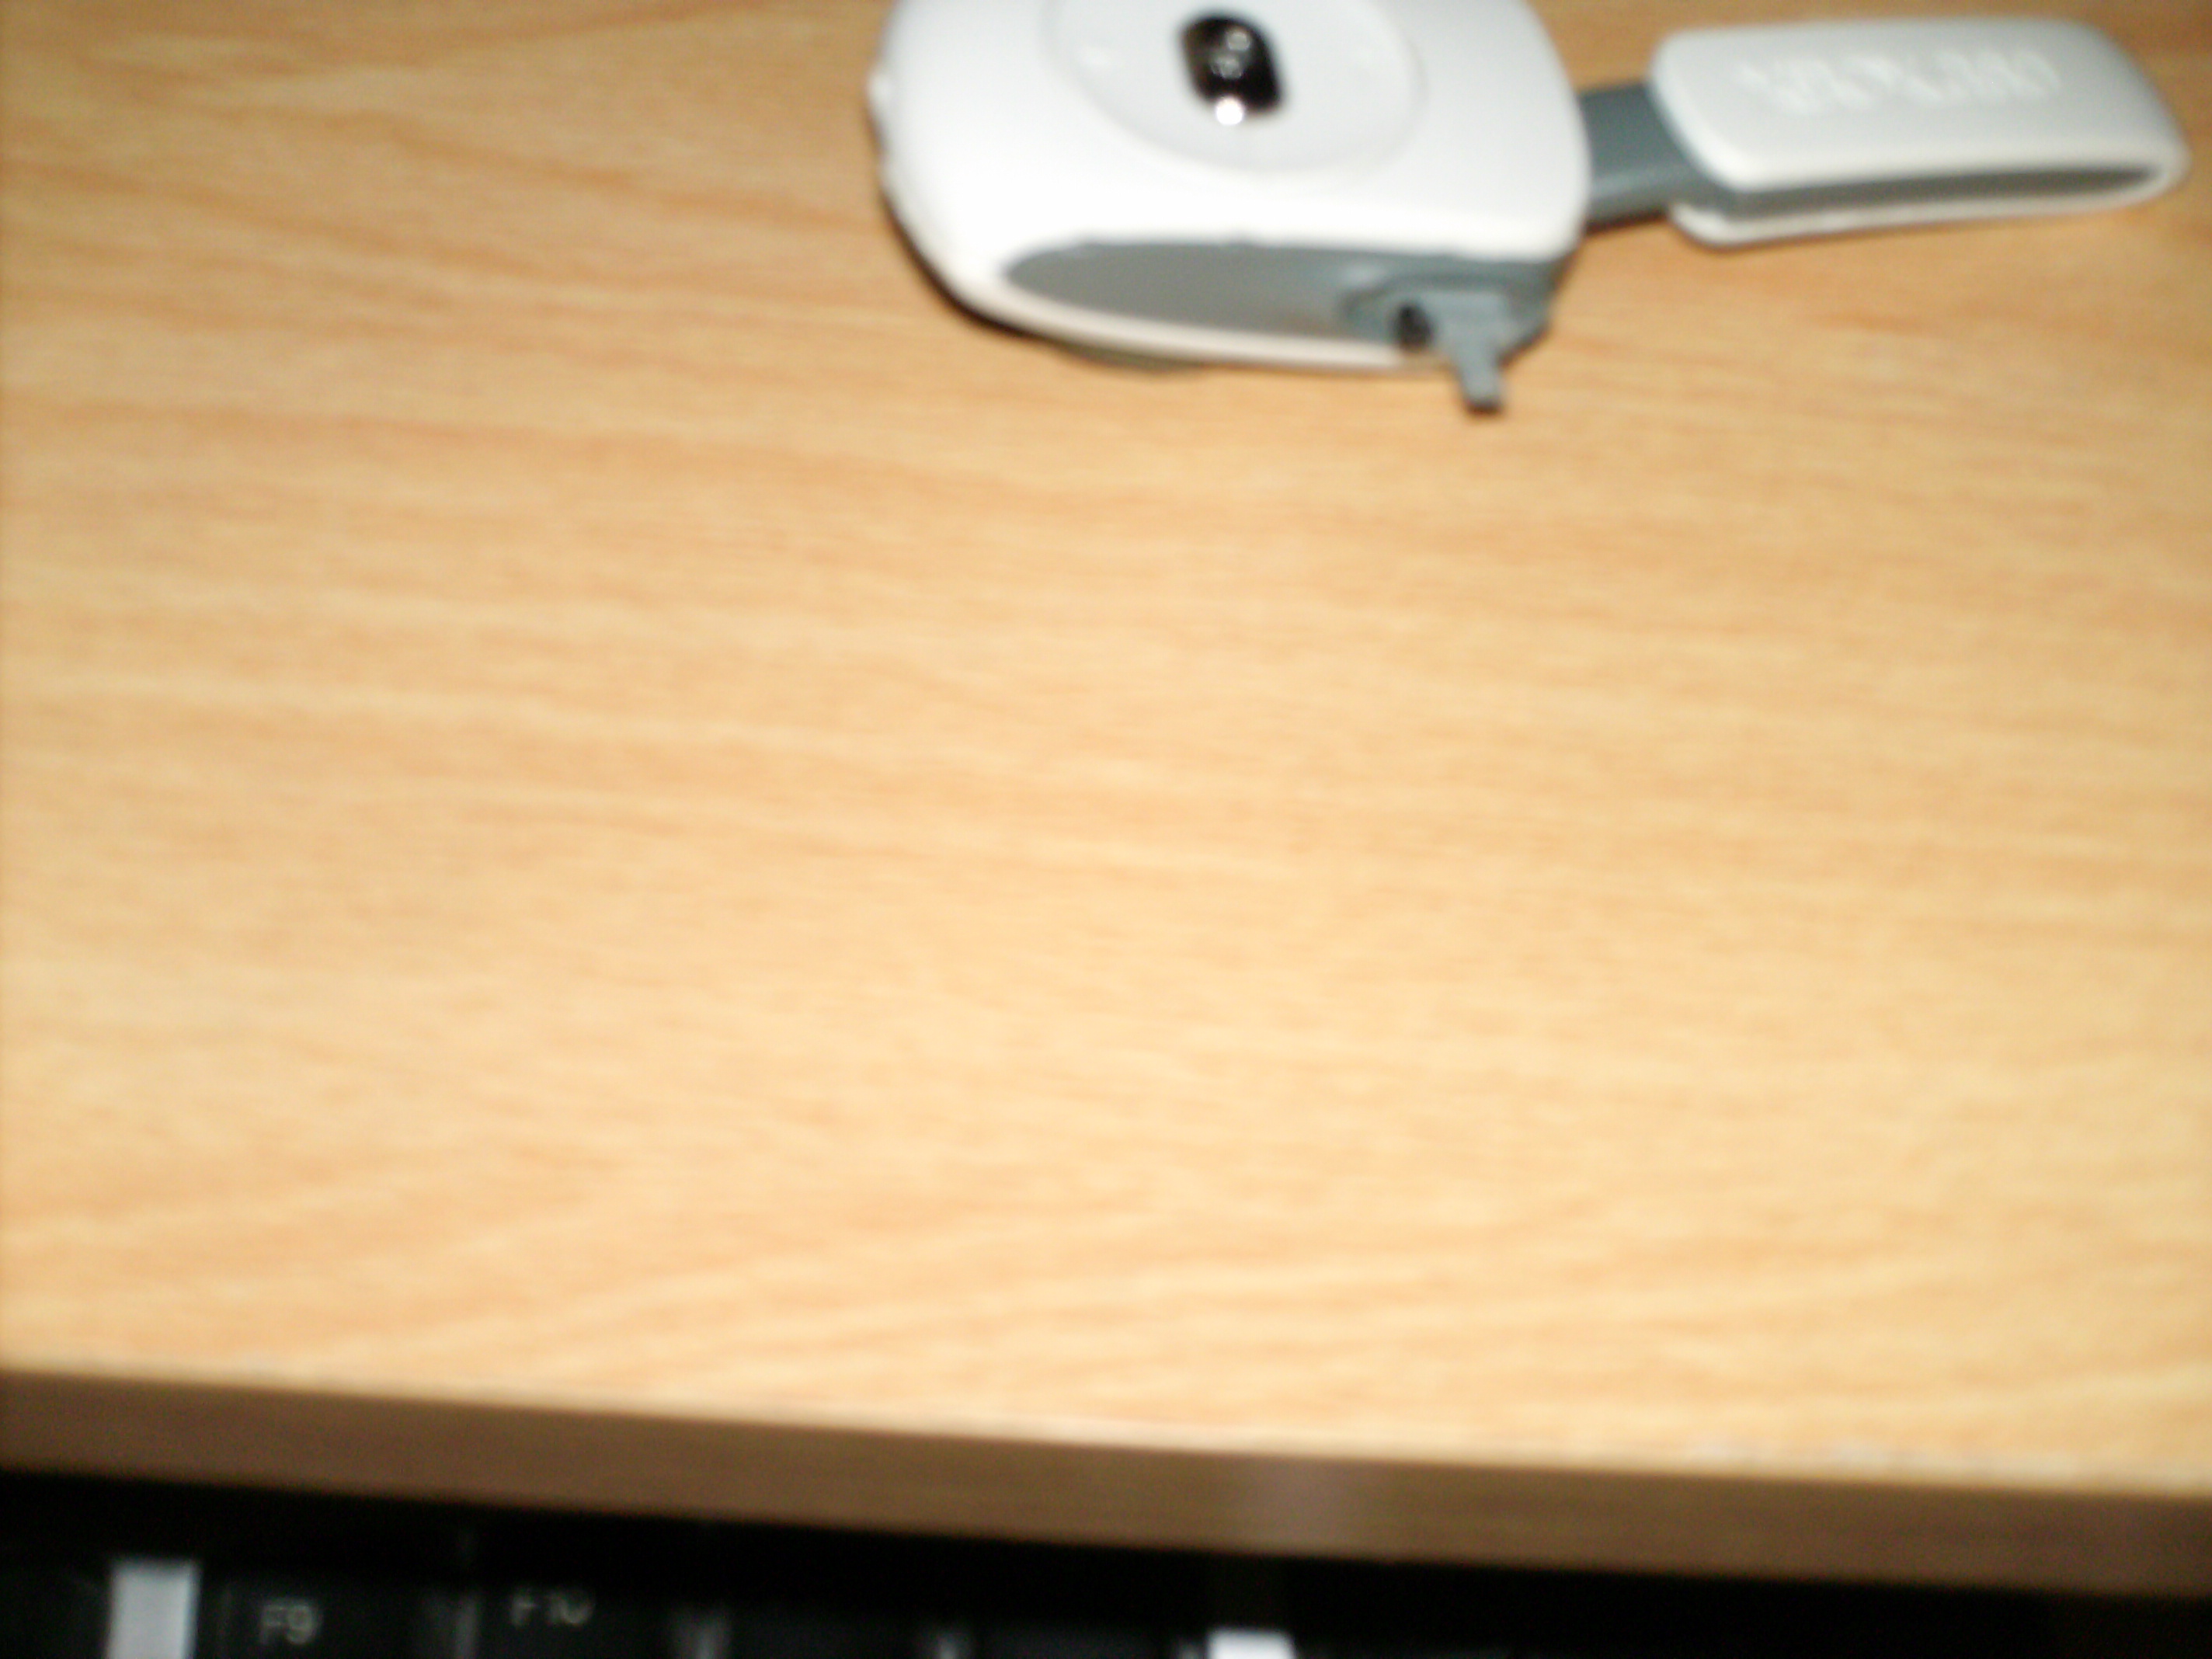
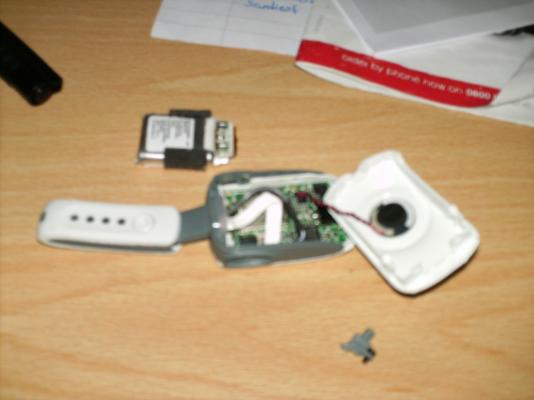
This tutorial (made by me) will teach you how to fix your Xbox 360 Wireless Mics. Materials Required 1. (Broken) Wireless Mic 2. (Normal) Flathead Screwdriver 3. Soldring Iron & Solder (solder must be Non-Lead Based) 4. (Normal) Battery Charger 5. Electrical wires (you can get these out of a broken wall clock or anything that requires batteries as a source of power) Step 1: (Removing Screws) You will have to remove the two screws on both sides of you mic. If you don’t remove both you Mic will break. Step 2: (Opening Your Mic) Look at the back of your Mic where you plug the Charging Cable in, jam a screw driver (Flat Knife its even better) in between the gap and force it open. After this is completed, it should look something like this (I have already removed my battery). Step 3: (Locating & Removing Battery) The battery is located directly in the middle of the Mic (Cube Shaped). Slowly lift it off the body of the Mic, it's glued and wired to it so do it very slowly. Step 4: (Remove Battery Tape & Wires) Simply remove the tape from the top of the battery. Get out your soldering iron and heat up the solder keeping the wires on the batter so that you can remove the wires without cutting the wires. Step 5: (Soldering) Solder the new wires on the battery. If you are unsure of how to approach this, please ask a parent for assistance. Note: On the side of the battery it will tell you the charges. (Right = -) (Left = +) Step 6: (Testing Battery) Now plug in the battery charger and as you should know the Red Wire (Positively Charged) goes on the top of the charger and Black Wire (Negatively Charged) goes on the bottom. Tape the black end to the bottom of the charger and slowly move the red across the top. Warning: If you tape both ends on it won’t charge at all. Note: If the Battery starts to get hot, remove it from the charger and continue later (When the Battery has cooled down). Step 7: (Battery Charge Test) Test if your battery charged by puting both the Red and Black wires on you tongue. If you will get a very little shock, you are almost done, if not, retry the above. Step 8: (Remove Wires & Heat Up Battery) Remove the wires/tape from the battery by heating the Solder. Important: Now, using the Flathead Screw Driver, put it across the 2 Terminals, this will start heating up the Battery very fast so don’t do it too long or it will explode. Step 9: (Conclusion) After you have let the battery cool down solder the Red and Black Wires to where the should be, close your Mic and it should be working. Good Luck. Made by JMD ALMIGHTY

-
yes its the thwe 360 wirless mics thaks for the help
-
ok so i figured out how to repair wirless mics because for some reson the die after a few monts of purchase but i dont know in whare to put the tut bacilly what sub section
-
does this work in customs or off xbl
-
hold on are u saying that u have a modified xex that works on retail or are u meaning on a dev
-
ths topic can be closed problem fixed i reistalled windos thanks everyone for help.
-
lol
-
nooo did u even read his post
-
i second that B)
-
lol tru but what if someone made a dot map signer for halo 3 and it was only on this site plus it couldt be downloade it was onl one the site and u have uplod ur file sign it the re dowlod lots of people would come to ibm but never gonna get the dot signer