Rapid Fire Modded Controllers
This tutorial is to help you in your installation of my
Preprogrammed 8-pin Microchip. The installation must be
done exactly as shown in this tutorial or your buttons may
not function correctly.
WARNING:
Please proceed with the installation at your own risk as I will not
be held responsible for any damage to your controller, your
Xbox 360 or any other equipment. Also know that opening your
controller up will void your controller‚??s warranty.

Step 1 - You should have all of the following Parts & Tools
Parts:
2 - 1K Ohm Resistors
2 - Buttons
1 - Preprogrammed Microchip
30G Wire
Tools Needed:
T8 or T9 Security Torx Screwdriver
Small Phillips head screwdriver (wired controllers)
Glue Gun
Soldering Iron
Wire Strippers that can strip 30G wire
Wire Cutters
Drill with 3/16 Drill Bit (or close to)
STEP 2 - Opening the Controller
Wireless Controllers - Take your T8 or T9 screwdriver and remove the 7 screws shown
in the picture below.
Wired Controllers ‚?? Take your Small Phillips screwdriver and remove the 7 screws
shown in the same location as the picture below.
Once you have the controller open place the top, buttons and the thumb sticks off to
the side.

STEP 3 ‚?? GLUE THE CHIP DOWN
Take the Preprogrammed Microchip and glue to the controller in the location in
the picture below
Important: Make sure the notch of the chip is facing the bottom of the controller

STEP 4 ‚?? Wire Power and Ground to the Microchip
Take you soldering iron and solder a 3in long wire to the positive power lead
highlighted in the picture below.
Also solder another 3in long wire to the ground lead highlighted below
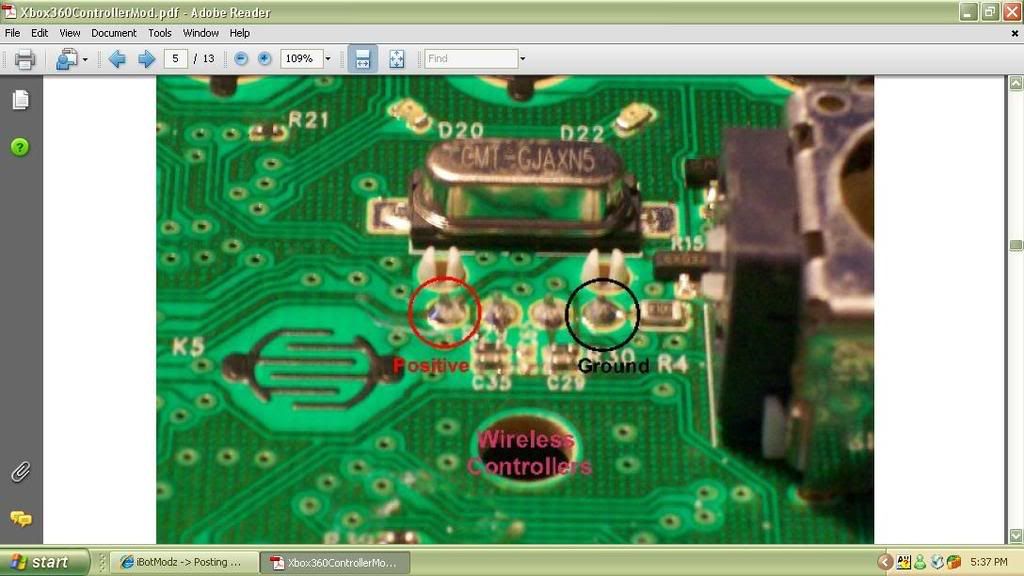
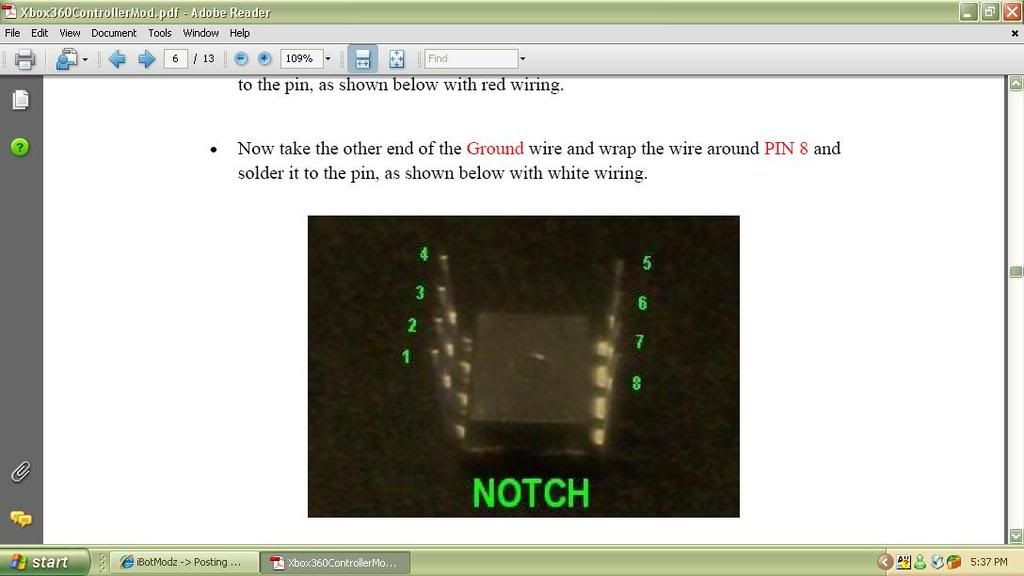
STEP 5 ‚?? WIRE POWER AND GROUND TO YOUR CHIP
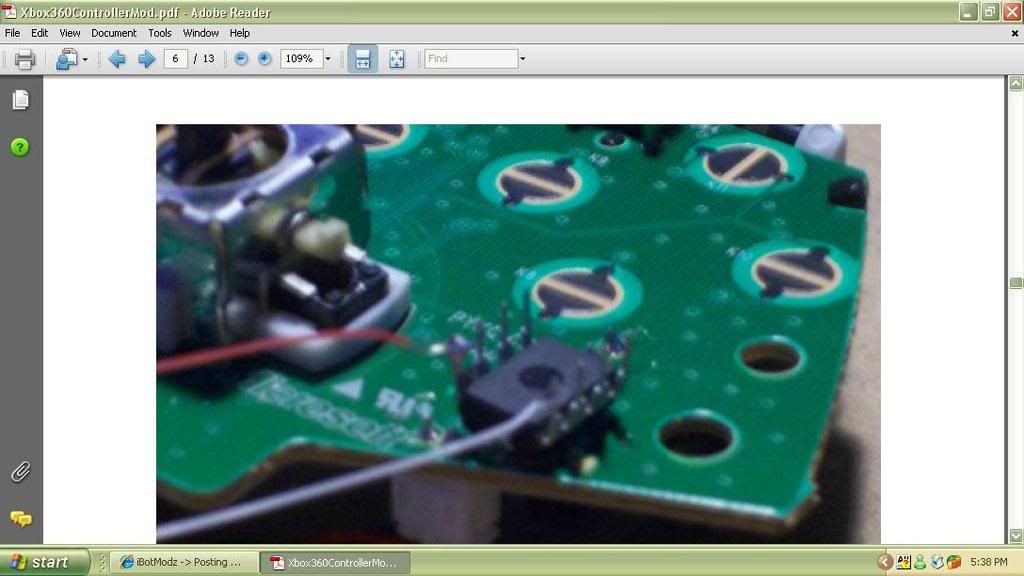
Take the other end of the Power wire and wrap the wire around PIN 1 and solder it
to the pin, as shown below with red wiring.
Now take the other end of the Ground wire and wrap the wire around PIN 8 and
solder it to the pin, as shown below with white wiring.
STEP 6 ‚?? HOOK UP THE 1K RESISTORS
Take the (2) 1K Ohm resistors and trim one end down so there is only a
little bit left showing
Now solder the resistors to the middle lead of the right and left trigger points
as shown below in the picture.

STEP 7 ‚?? INSTALLING THE BUTTONS
Take your Drill and Drill holes in the areas of the pictures below of the bottom half of
the controller case.
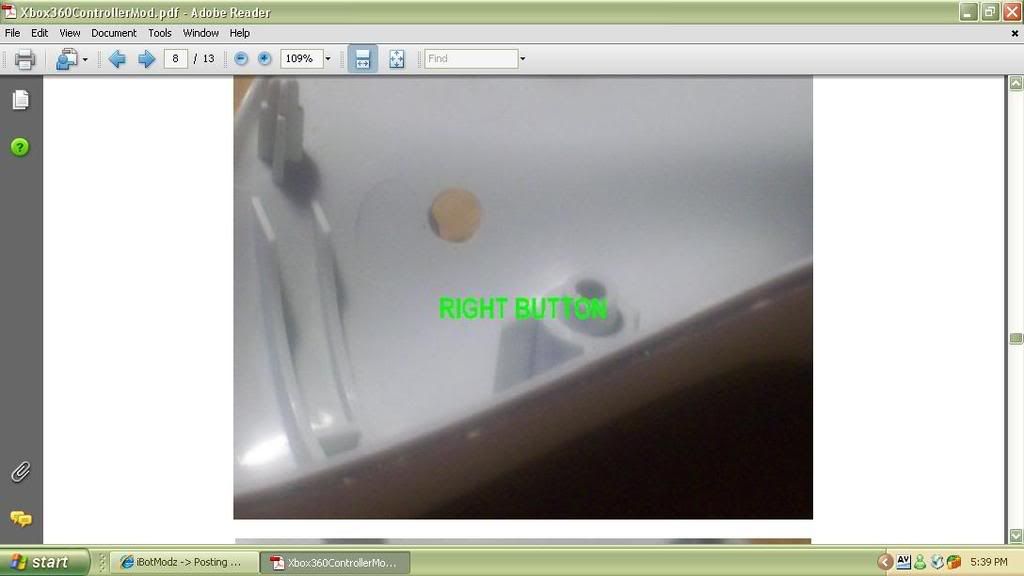
Same with the other side
STEP 8 ‚?? GLUE DOWN YOUR BUTTONS
Now hold your buttons in place to make sure they fit and work. When you push
your button it will make a click sound.
Now that it works, glue them both in place. Like the picture below.
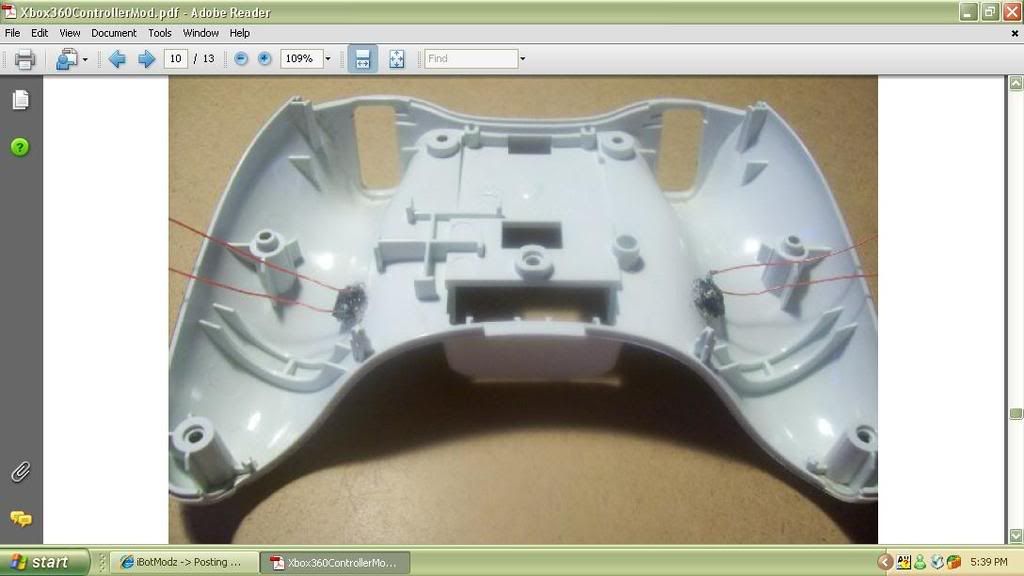
STEP 9 ‚?? ADDING WIRE TO YOUR BUTTONS
Only 2 of the terminals on the each button will be used on the same side of the button, so
you can either bend them up or cut them off.
Solder 2 wires to each button about 3 ‚?? 4 inches in length.
STEP 10 ‚?? THE OTHER END OF YOUR BUTTONS WIRE
One wire will go to the other end of one of the resistors on the same side of the
controller. (does not matter which one)
The other wire will be soldered to PIN 2 on the chip. As shown below.
And for the other button that wire will be soldered to PIN 3 on the chip.

STEP 11 ‚?? SECURING THE WIRES
Now you need secure the wires with your hot glue gun, so they will not get in the way or
move around.
STEP 12 - Test Controller
You have now finished the installation and it is time to test your controller to make
sure everything is working.
If there is a problem with your installation, retrace your steps and look for mistakes.
STEP 13 ‚?? PUT THE CONTROLLER TOGETHER
You are done with the installation of you mod kit and everything works!!!!
Put the case back together again using your tools.
This tut was made from xXxStevenxXx of ******


