Pop off your faceplate, and look in the little hole in the drive at the color of the wires.
If it matches that, you are at the right tutorial.
Samsung Drives
Ok, this drive type is very easy. You will need the following:
- A compatible chipset (trial and error works, you can't mess anything up when just reading)
- A SATA cable.
- This download - yungbol's Sammy kit.
 yungbol__s_kit.rar 2.33MB
870 downloads
 - A 32-bit OS.
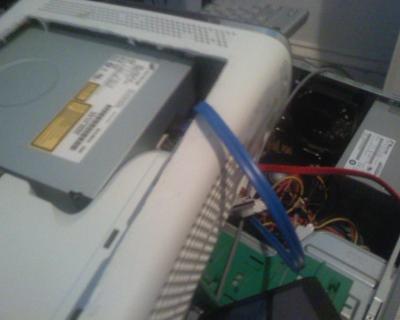
Step 2: Shut down your computer. Hook your Xbox360 up like you normally would when playing (power cord and video cord). The Xbox needs to be opened, and next to your computer. The SATA cable in back of the drive should be unplugged, and insert the one that is connected to your computers SATA chipset like so:
Step 3: Now, power on your PC then wait a few seconds until it boots up and turn on the Xbox 360.
Step 4: Open up JungleFlasher.exe. Navigate to the MTKFlash32 tab. Search your I/O ports for the one that has your ms25 or ms28 in the Device Properties. Once you find it, it should look like so:
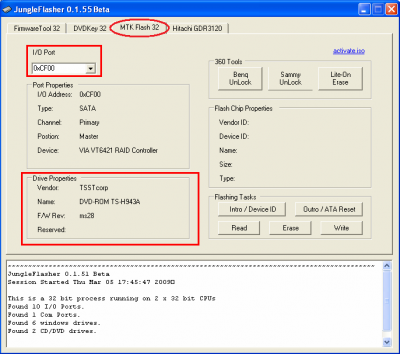
Step 5: Once your info is there, click Sammy unlock. If you cannot find your info, change SATA ports, and if that doesn't work, then your chipset is not compatible or your PORTIO32 isn't installed.
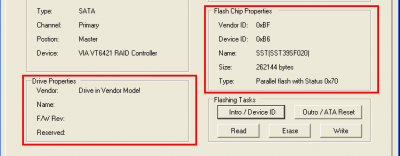
Step 6: Make sure the drive is in Vendor Mode (0x70) and returned a good flash chip property; you can check under Flash Chip Properties, Drive Properties should show "Drive in Vendor Mode!"
Step 7: Click Read. Once it reads, it will ask you to save it. Save it somewhere safe, this is your original firmware file. Keep this. When it ask you to auto-load, click yes. It will bring you to the Firmtool32 tab.
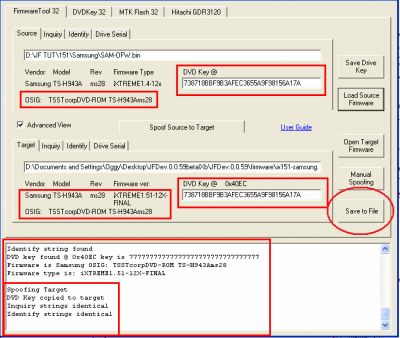
Step 8: Confirm your keys are the same, and your info. Once that, click Save to file. After you save, navigate back to the MTKFlash32 tab.
Step 9: Click Write. It will erase, and write your new firmware. Once that is verified OK, click Outro / ATA reset.
Step 10: YOU ARE DONE! Disconnect everything, hook it back up, and go burn some games!


