Hello, and welcome to my Halo 3 Bubbleshield tutorial.
Today I'm going to show you how to succesfully create the Bubble Shield
(This is my first tut so don't be to harsh.
Step 1: Open up 03a_oldmombasa.map, and any MP map.
Step 2: Select the soccerball tag in old mombasa under the [bloc] tag. Now check the recursive and parsed boxes and save the soccerball.
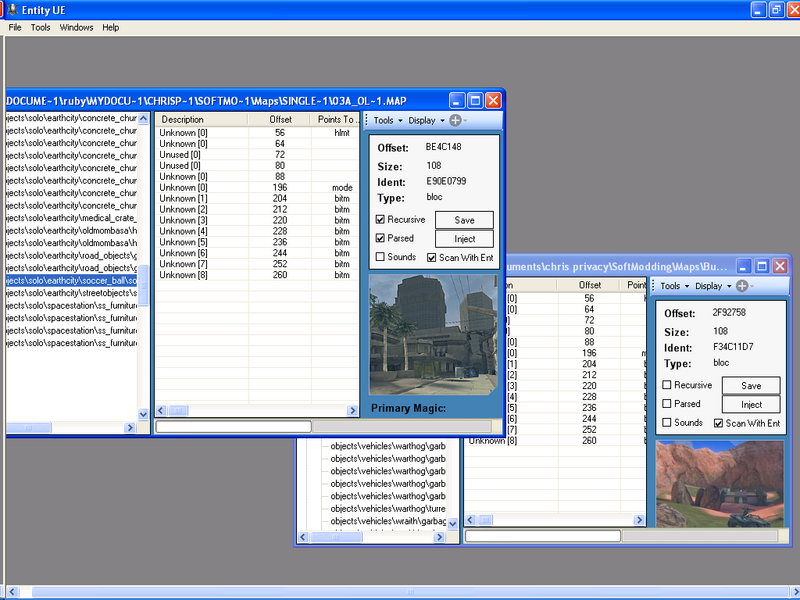
Step 3:Build the Ball into your MP map. Wait for the done box and then go ahead and close the SP map.
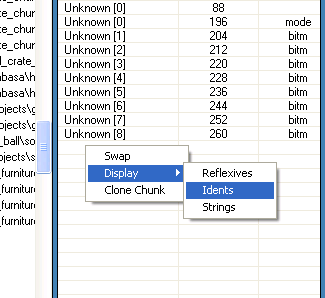
Step 4:Go to the soccerball tag under the [hlmt] tag in your MP map and go to the idents display.
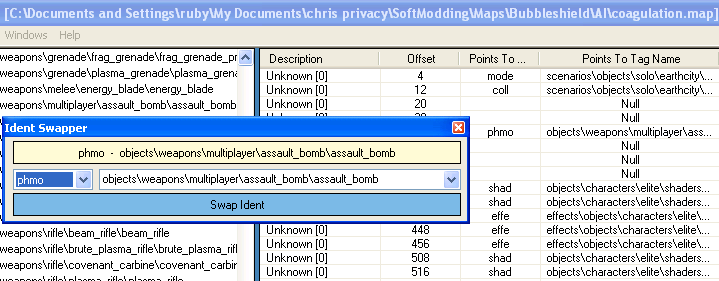
Step 5:Click on the phmo reference of the soccerball and right click to swap it to a SMG or anything related to it like a flag or assault bomb, as long as you can walk through the object. This makes it walkthrough, but makes it not work when you throw it as a grenade. (to my testing knowledge, you are welcome to experiment.)
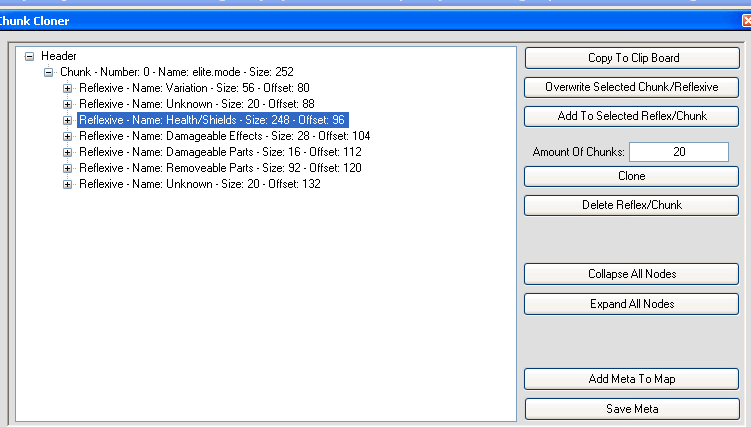
Step 6: We are going to go ahead and give the shield health/shields. For starters this will just make the shield look better when shot at because it'll have that shield collision effect. Still under the [hlmt] tag go to the elite_mp tag. Go to the idents and right click and select clone chunk. Now click on the health/shields chunk and copy to clipboard. Close the chunk cloner and go to the soccerball's chunk cloner and click the main link of the soccerball then "Add top selective/reflexive." then add meta to map.
It should look like this when you are done.
Step 7: Sigh in relief that the hardest step is finished.
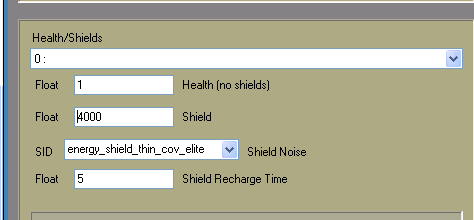
Step 8: Click tools-meta editor then scroll down to the health and shields part. You can put the health to 1 or something (not 0 because usually that value does not mean 0) Now put the shield value to something high like 4000. It should look something like this when you are done. (don't forget to hit save when you finish the shield editing.
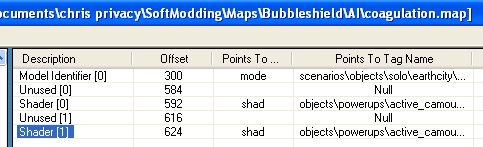
Step 9: Travel to the [mode] tag of the soccerball. Switch to the idents view. There are two shaders here. One should be soccerball black and the other white. At this point it is preference of how you like things to look. An easy shield look is to switch both the shaders to Active_camo-glass-Active_cammo-or edge. You can even do a overshield instead if you like yellow instead of blue. Experiment with this if you like and find what you like the most.
Step 10: If you try to make the shield a grenade it may take a while to figure out how to get it to work because through my countless testing I never got the shield to work through the grenade. But if you make the shield a projectile it should work just fine. Yamagushi seemed to have a good solution though, go ahead and try that!
Step 11:Open the [coll] tag of the item you are using to spawn the soccer ball and open the meta editor. Make the item you are using the same as the Planes, Leaves, 2D Refrences, Surfaces, Edge Buffer, and Vertices of the soccer ball leave the rest the same.
Step 12:You are done enjoy your bubble shield.
This Tutorial was not made by me it was made by Rockymods.