Flashing an Xecuter 3 via HTTP Flash
Of course you must have your Xbox connected to your PC's network to use this function. There are many tutorials here on how to do this - all you need is a crossover cable network cable if connecting direct to your pc or a standard network cable if you are plugging into a hub or router. If you have any problems just make sure any firewall is disabled. If DHCP doesn't work static ip should work fine (static IP is always 192.168.*.*). Don't forget to make sure your flash protection is disabled before continuing !
*= wildcard
Select Enable Network Flashing.
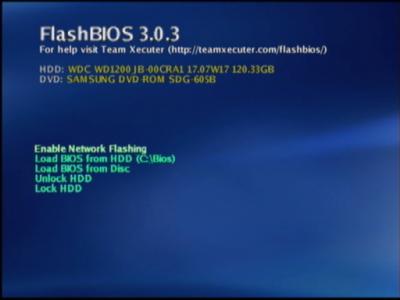
The TCP/IP protocol is now initialized. This process will take no more than 60 seconds to scan for a DHCP assigned IP address. Obviously make a note of whatever address you are assigned and then skip the next step.
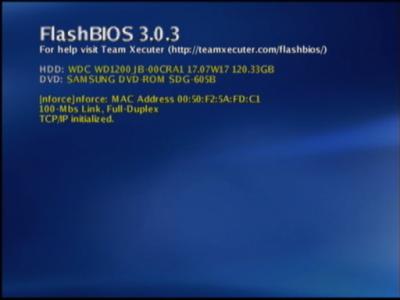
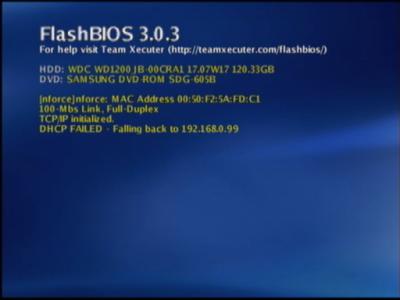
If a DHCP assigned IP address cannot be found then you are assigned a static IP address (always part of local subnet)
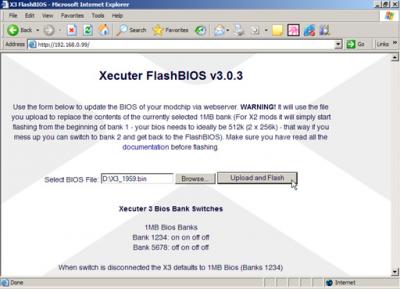
Open up Internet Explorer (may or may not work in Firefox) and type in the IP address that you have been assigned e.g. http://192.168.0.99. If your network is working correctly you will see this screen. All you need to do is make sure you have the bios you wish to upload and that your X3 switches are set to 1mb mode (this can also be achieved by not connected the switch at all - default is 1MB Banks 1234) Everything is explained on screen. For this example we have selected X3 1959 Bios.
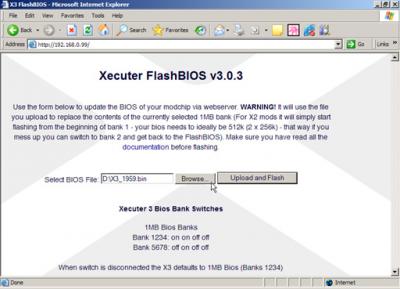
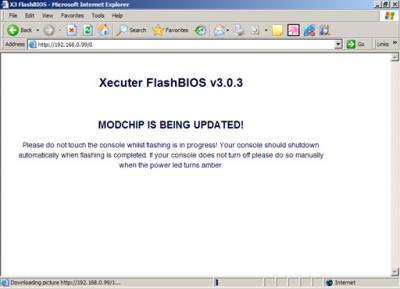
Now select upload and flash.
Now you need to check your TV screen to see if everything is going smoothly.
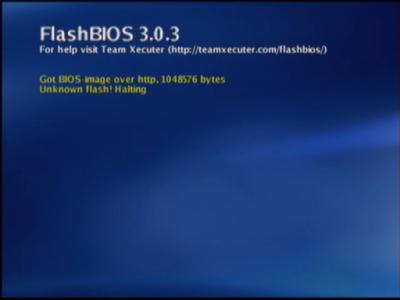
This is what happens if your X3 has its flash protection enabled. You wont be able to update anything at this stage. You need to make sure the flash protection is set to off on the mod and on the switch if you have it connected. You will need to start over from the beginning.
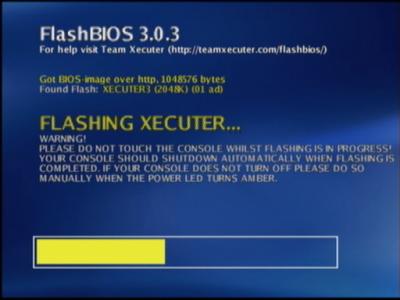
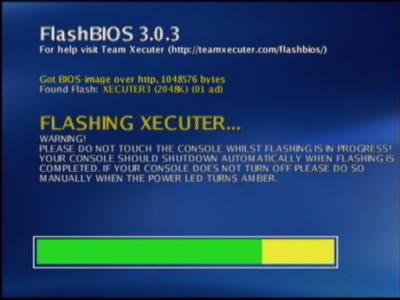
As you can see the 1MB (1024k) Bios has been grabbed from the network, the X3 2MB (2048k) Flash Rom has been detected and things are progressing nicely. The yellow bar = ERASING.
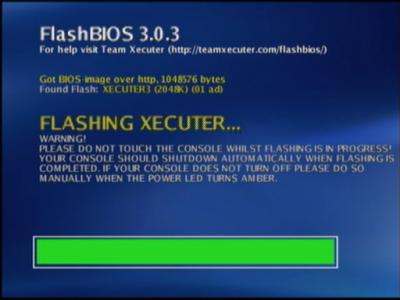
Superb we are almost there. The green bar = FLASHING.
The Flash has now completed. The Xbox will now turn off automatically. Now turn it back on again yourself (quick press power button so X3 Logo on switch is BLUE).
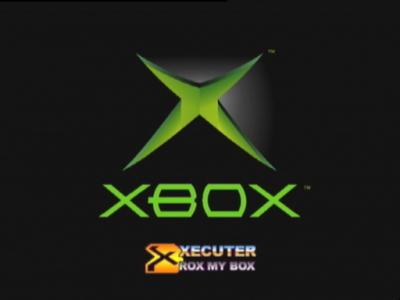
Success! Enjoy Your new Xbox adventure.
From Team-Xecuter to preserve the end of Halo 2 and Xbox Modding
Of course you must have your Xbox connected to your PC's network to use this function. There are many tutorials here on how to do this - all you need is a crossover cable network cable if connecting direct to your pc or a standard network cable if you are plugging into a hub or router. If you have any problems just make sure any firewall is disabled. If DHCP doesn't work static ip should work fine (static IP is always 192.168.*.*). Don't forget to make sure your flash protection is disabled before continuing !
*= wildcard
Select Enable Network Flashing.

The TCP/IP protocol is now initialized. This process will take no more than 60 seconds to scan for a DHCP assigned IP address. Obviously make a note of whatever address you are assigned and then skip the next step.

If a DHCP assigned IP address cannot be found then you are assigned a static IP address (always part of local subnet)

Open up Internet Explorer (may or may not work in Firefox) and type in the IP address that you have been assigned e.g. http://192.168.0.99. If your network is working correctly you will see this screen. All you need to do is make sure you have the bios you wish to upload and that your X3 switches are set to 1mb mode (this can also be achieved by not connected the switch at all - default is 1MB Banks 1234) Everything is explained on screen. For this example we have selected X3 1959 Bios.

Now select upload and flash.

Now you need to check your TV screen to see if everything is going smoothly.

This is what happens if your X3 has its flash protection enabled. You wont be able to update anything at this stage. You need to make sure the flash protection is set to off on the mod and on the switch if you have it connected. You will need to start over from the beginning.

As you can see the 1MB (1024k) Bios has been grabbed from the network, the X3 2MB (2048k) Flash Rom has been detected and things are progressing nicely. The yellow bar = ERASING.

Superb we are almost there. The green bar = FLASHING.

The Flash has now completed. The Xbox will now turn off automatically. Now turn it back on again yourself (quick press power button so X3 Logo on switch is BLUE).

Success! Enjoy Your new Xbox adventure.

From Team-Xecuter to preserve the end of Halo 2 and Xbox Modding


